Using Allen Bradey's RsLinx BOOTP DHCP Server to Set and IP Address
Firewalls and port blockers can prevent this procedure from working.
- Connect your PLC and your PC to an Ethernet switch:
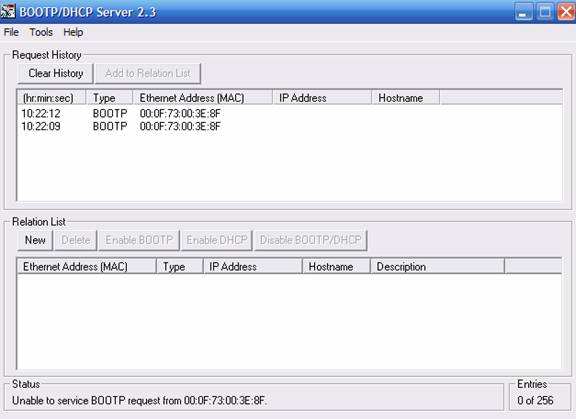
Go to Start Menu > Rockwell Software > BOOTP-DHCP Server and select the program BOOTP-DHCP Server. Your shortcut may vary on your computer but this is the default for this shortcut.
- Within a few seconds you will see your device begin to make requests for an address

- Select one of the requests out of the “Request History” and press the “Add to Relation List.” Enter the IP Address you wish to assign to the device and press OK For this example the IP Address is 192.168.210.100 but yours will be different depending on your network configuration

- In the lower half of the screen you will now see your device added to the “Relation List”

- Within a few seconds you will see your device request an IP Address again only this time you will see the IP Address you assigned in the “IP Address Column. You are now ready to configure RsLinx.


Note that this is only a temporary assignment of the IP Address and you still must assign the device a permanent IP Address. You may now close the BootP Server. I would not worry about saving your changes on the BootP Server as these setting were temporary just to set the IP Address so that you can connect to the device with RsLinx

Comments
Post a Comment